65337ed57a

Leave Your Message

7 Tips for Choosing Welding Fixture Tables

Choosing the right Welding Fixture Tables can determine whether a fabrication job feels controlled or constantly improvised. In a busy workshop, a table must hold steel securely while clamps, stops, and measuring tools remain accessible. A warped plate, poorly spaced holes, or weak legs can turn a simple frame into an afternoon of adjustments. My experience with welding setups has shown that attractive specifications do not always match daily needs. Real value appears when the table stays stable, cleans easily, and supports repeatable positioning. Even a small mismatch matters. A bracket may sit 2 millimeters off, then expose a larger problem during assembly. These seven tips examine the practical details behind table selection, from surface accuracy and hole patterns to load capacity and modular flexibility.

A dependable choice also requires evidence. Look for clear material information, tested load ratings, dimensional drawings, and customer support that answers technical questions directly. Reputable manufacturers should explain how surfaces are machined, how hardness is verified, and how corrosion protection is maintained. Do not trust every impressive number. Ask how it was measured. Consider your actual work. Thin stainless panels need different support than heavy structural frames. Frequent repositioning favors modular accessories and accessible clamping points. Budget matters, but replacement costs matter too. I have seen teams save money on a table, then lose hours correcting movement and distortion. That judgment can be wrong. Use the following tips as a practical filter, not a rigid formula. Compare each feature with your welding process, workspace, and long-term maintenance habits.
7 Tips for Choosing Welding Fixture Tables

Define the Purpose and Workpieces for the Welding Fixture Table

7 Tips for Choosing Welding Fixture Tables

Define the Purpose and Workpieces for the Welding Fixture Table

Begin with the workpiece, not the table. Record its length, width, weight, material, and welding sequence. A small steel bracket needs different support from a two-meter structural frame. Measure real parts, including clamps, torch access, and distortion allowance.

Sketch the assembly on paper. Mark datum points, locating pins, and areas requiring free access. A useful table should hold the part firmly without blocking the weld path. Experienced fabricators often leave more clearance than expected. Heat moves. Fixtures can become obstacles quickly.

The American Welding Society has estimated that the industry may need 330,000 new welding professionals by 2026. Clear fixture layouts can reduce training errors and improve repeatability. OSHA guidance also emphasizes stable work positioning and reduced ergonomic strain. These concerns affect table selection, not just operator comfort.

A versatile table sounds efficient. It may not be. Oversized surfaces can waste floor space, while weak grids can limit accurate location. Review your most common five workpieces, then check their loading points and tolerances. I would also test one difficult assembly before purchasing. That trial may expose awkward access, clamp interference, or a missing reference point. A perfect fixture rarely exists. A practical one leaves room for correction.
Choose the Right Table Size, Layout, and Working Height

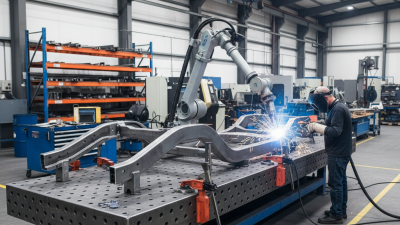
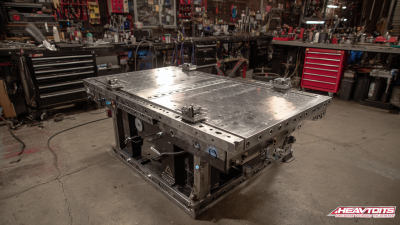
Choosing a welding fixture table starts with the workpiece, not the catalog photo. Measure your largest assembly, then add at least 20% clearance for clamps, tools, and hand movement. A table that barely fits often creates awkward repositioning. That mistake wastes time. Reserve one side for material staging and keep the opposite edge open for torch access. In practice, this simple layout can prevent cables from crossing the weld zone.

Working height deserves equal attention. OSHA identifies awkward postures and repetitive handling as important ergonomic risks in fabrication work. The U.S. Bureau of Labor Statistics reported that sprains, strains, and tears represented about 53% of private-industry cases involving days away from work in 2022. A height-adjustable table can reduce prolonged bending, especially when operators weld both low frames and tall assemblies. Set the surface near elbow height for detailed work, then lower it slightly for heavy clamping. Test the position with the actual helmet and gloves.

Choose a modular hole pattern if projects vary. Confirm that fixture access remains clear around corners and vertical supports. Check load capacity, surface flatness, and the space needed for a welding return path. A larger table is not automatically better; it may force longer reaches. Measure reach distance with real components. I would also leave future expansion space, although this can be difficult in a crowded shop. Review NIOSH’s Elements of Ergonomics Programs and compare the table design with your injury records before purchasing.

7 Tips for Choosing Welding Fixture Tables - Choose the Right Table Size, Layout, and Working Height

Tip Selection Factor Practical Guidance Typical Options or Reference Values Why It Matters
1 Table Size Choose a surface that supports the largest workpiece while leaving room for clamps, stops, and measuring tools. Compact work: approximately 600 × 600 mm; general fabrication: approximately 1,200 × 2,400 mm; larger assemblies may require modular or joined tables. Adequate workspace reduces repositioning, improves access, and helps maintain consistent dimensions during welding.
2 Hole Pattern and Layout Select a hole diameter and spacing that match the clamps and accessories used in your workshop. Common fixture layouts use a regular grid, such as 16 mm or 28 mm holes, with spacing commonly around 50 mm or 100 mm. A compatible grid allows repeatable positioning and makes it easier to secure irregular or angled components.
3 Working Height Set the surface height according to the operator’s stature, welding position, and the height of the assemblies being built. Fixed tables are often around 750–900 mm high; adjustable tables can accommodate different operators and seated or standing work. The correct height helps reduce bending, shoulder strain, and awkward torch angles during extended work.
4 Load Capacity and Support Check the rated load for both evenly distributed work and concentrated loads from jacks, clamps, or heavy fixtures. Select a capacity above the heaviest planned assembly and account for dynamic loading when parts are placed or repositioned. A rigid, adequately supported table is less likely to deflect, vibrate, or lose alignment under load.
5 Surface Thickness and Flatness Choose a thick, machined surface when dimensional accuracy and repeated setups are important. Steel tops are commonly produced in thicknesses such as 12 mm, 16 mm, or 28 mm; the suitable choice depends on load and application. Greater thickness generally improves rigidity and resistance to local distortion, while a flat surface supports accurate fit-up.
6 Layout, Mobility, and Access Match the table configuration to the available floor space, material flow, and need to access multiple sides of the assembly. Options include fixed legs, leveling feet, casters with locking brakes, side extensions, and modular table sections. A suitable layout improves material handling and operator access without compromising stability during welding.
7 Material, Finish, and Maintenance Use a welding-compatible steel surface with a finish that resists spatter and can be cleaned without damaging the reference surface. Common features include treated steel, replaceable wear surfaces, removable spatter, corrosion protection, and accessible leveling components. Regular cleaning, inspection, and leveling help preserve accuracy, extend service life, and prevent workpieces from sitting unevenly.

Compare Table Materials, Thicknesses, and Load Capacities

7 Tips for Choosing Welding Fixture Tables

Compare the table material before chasing a low price. ASTM A36 steel provides a minimum yield strength of 250 MPa, while ASTM A240 Type 304 stainless steel specifies 205 MPa. ASM Handbook data also shows that heat resistance and stiffness depend strongly on alloy and section thickness. Steel is usually economical, but stainless steel can reduce corrosion problems in damp workshops.

Choose thickness from actual loading, not appearance. A 25 mm plate may resist a heavy frame, yet a wide unsupported span can still sag. Ask for rated working load, test load, and deflection at the rated load. Load is not leverage. A 1,000 kg fixture with a 600 mm overhang creates more bending than its weight suggests. Use the manufacturer’s load diagram, then verify support spacing with an engineer. My practical mistake was trusting a thick-looking plate without checking underside reinforcement.

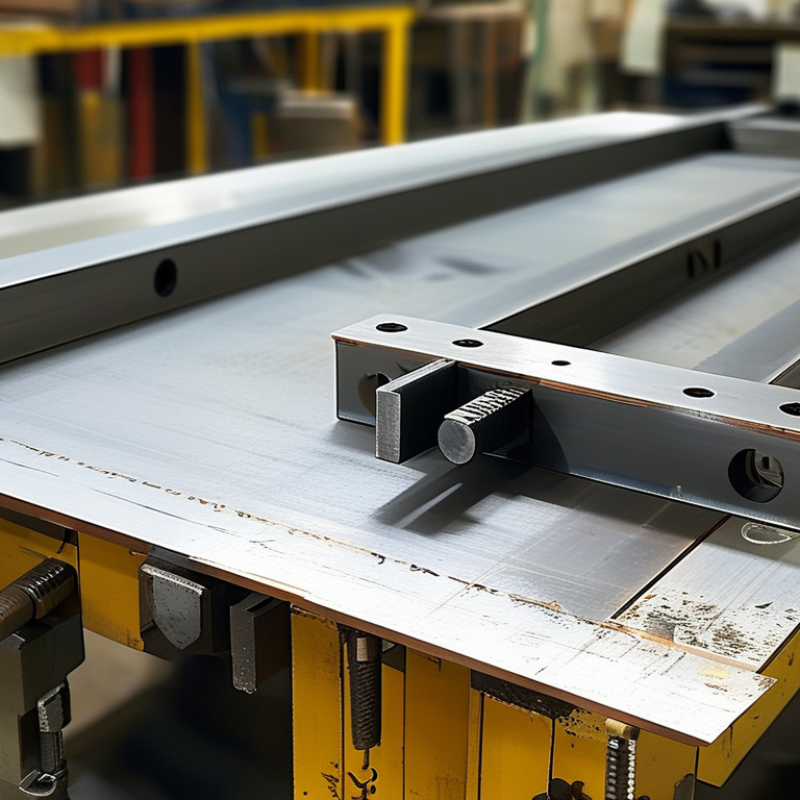
Match hole diameter and spacing to your clamps. Check flatness after thermal cycling, because repeated weld heat can distort even a rigid table. AWS Welding Handbook guidance supports controlling heat input and restraint when dimensional accuracy matters. Request material certificates, hardness data, and a documented load-test method. ISO 3834’s quality principles also favor traceable inspection records. A tidy estimate can be wrong. Recheck the table after one month of production use, especially around heavily clamped corners.

Evaluate Hole Patterns, Clamping Systems, and Modular Accessories

7 Tips for Choosing Welding Fixture Tables

Evaluate Hole Patterns, Clamping Systems, and Modular Accessories

Choose a hole pattern that matches your daily work. Common 16 mm and 28 mm grids support different fixture scales. Measure your existing clamps before ordering. A small mismatch can create expensive rework. Check hole spacing, edge distance, and plate thickness. Precision matters more than appearance.

Select clamps with enough reach and safe adjustment travel. Quick-action clamps reduce setup time, but they may sacrifice fine control. Manual screw clamps often hold irregular parts better. Test one clamp against a real weldment. It should resist movement without distorting thin material. That balance is easy to underestimate. The U.S. Bureau of Labor Statistics projects about 42,600 annual openings for welders, cutters, solderers, and brazers during 2023–2033. Reliable fixtures can help less-experienced operators repeat approved setups.

Add modular accessories that solve measured problems. Use stops for location, risers for clearance, and angle blocks for repeatable joints. Avoid buying every accessory at once. A crowded table can slow inspection and hide errors. Confirm load ratings and surface flatness through documented test procedures. Industry quality guidance, including ISO 3834 practices, emphasizes controlled production conditions and traceable results. Record the fixture layout with a simple sketch or photo. Then review it after several jobs. My first layout would probably include too many stops; practical feedback usually reveals the unnecessary ones.

Check Accuracy, Durability, Maintenance, and Overall Cost

Accuracy comes first. Measure table flatness, hole spacing, and repeatability with calibrated tools. Compare results with ISO 13920 tolerances for welded constructions. Check clamping points under real loads, not only on paper. A small error can become a visible gap after several welds. Tip three: inspect the working surface for distortion after heating. It may look flat today.

Durability needs evidence. Check plate thickness, material hardness, load ratings, and resistance to spatter and corrosion. Tip four: choose replaceable bushings, pins, and sacrificial plates. Tip five: ask how fast damaged parts can be changed. The U.S. Department of Energy’s Operations & Maintenance Best Practices Guide estimates predictive maintenance can reduce costs by 8–12% compared with preventive maintenance. It also reports savings of roughly 30–40% compared with reactive maintenance. These figures are estimates, not promises.

Maintenance is practical discipline. Clean spatter daily, inspect threads weekly, and record dimensional changes. Tip six: confirm access for brushes, gauges, and lifting equipment. Tip seven: calculate total cost, including clamps, calibration, repairs, training, and downtime. A cheaper table may consume more labor during setup. I have seen teams ignore fixture storage space. That mistake returns later. Use supplier test records, independent inspection results, and a written warranty. Also question vague accuracy claims. Numbers without test conditions are weak evidence.